Introduction
Thank you very much for choosing our application. We truly appreciate and really hope that you'll enjoy our script!If you like this script, Please support us by rating us 5 stars (Rate us Here)
Grostore - React Next Js eCommerce Solution
Used Technologies
- Next.js app router
- Tailwindcss
- Bootstrap
- Node.js (Express.js)
- MongoDB (Mongoose)
User Panels
- Admin Panel
- Store Frontend
Core Features
This is a complete eCommerce template built with React, Next.js and Tailwindcss with Rest API integration. This template is backend ready and it's built with node, express, and uses MongoDB for the database. We did all schema validation for saving data.Here is some core feature of this project
- Complete Full-Stack Project with backend integration.
- Dynamic translation on all dynamic data.
- Product Attributes and Combination.
- Staff CRUD(Create, Read, Delete, Update).
- Product CRUD(Create, Read, Delete, Update).
- Category CRUD(Create, Read, Delete, Update).
- Coupon CRUD(Create, Read, Delete, Update).
- Setting for controlling admin and store.
- Controlling customer orders.
Need Support?
If you have any questions about the script, please sent a email to us support@themetags.comInstallation
As you already installed Node on you machine, so no need to re-install again, Just check you installed properly by node --version
NPM Packages:
- After downloading the template, unzip it
- Open the VS Code Terminal/System Terminal
- Go to the folder (admin): (cd path/to/template)
- Run: npm install, it will install all used packages for this admin.
- Make sure that there is no error.
-
Rename
.env.exampleto.env.local -
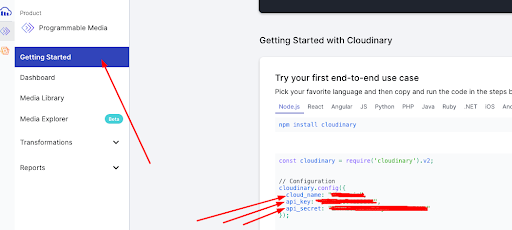
Please watch this video for Cloudinary configuration
Cloudinary configuration,
doc
(We used Cloudinary for profile image upload).
Get your cloud_name,api_key and api_secret
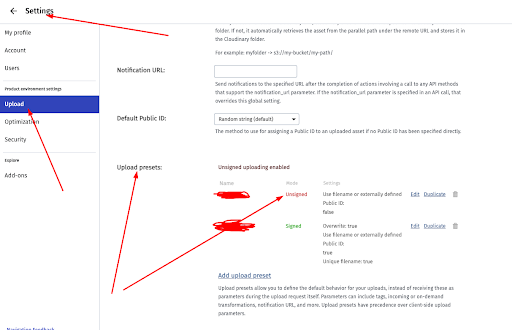
Get your upload preset
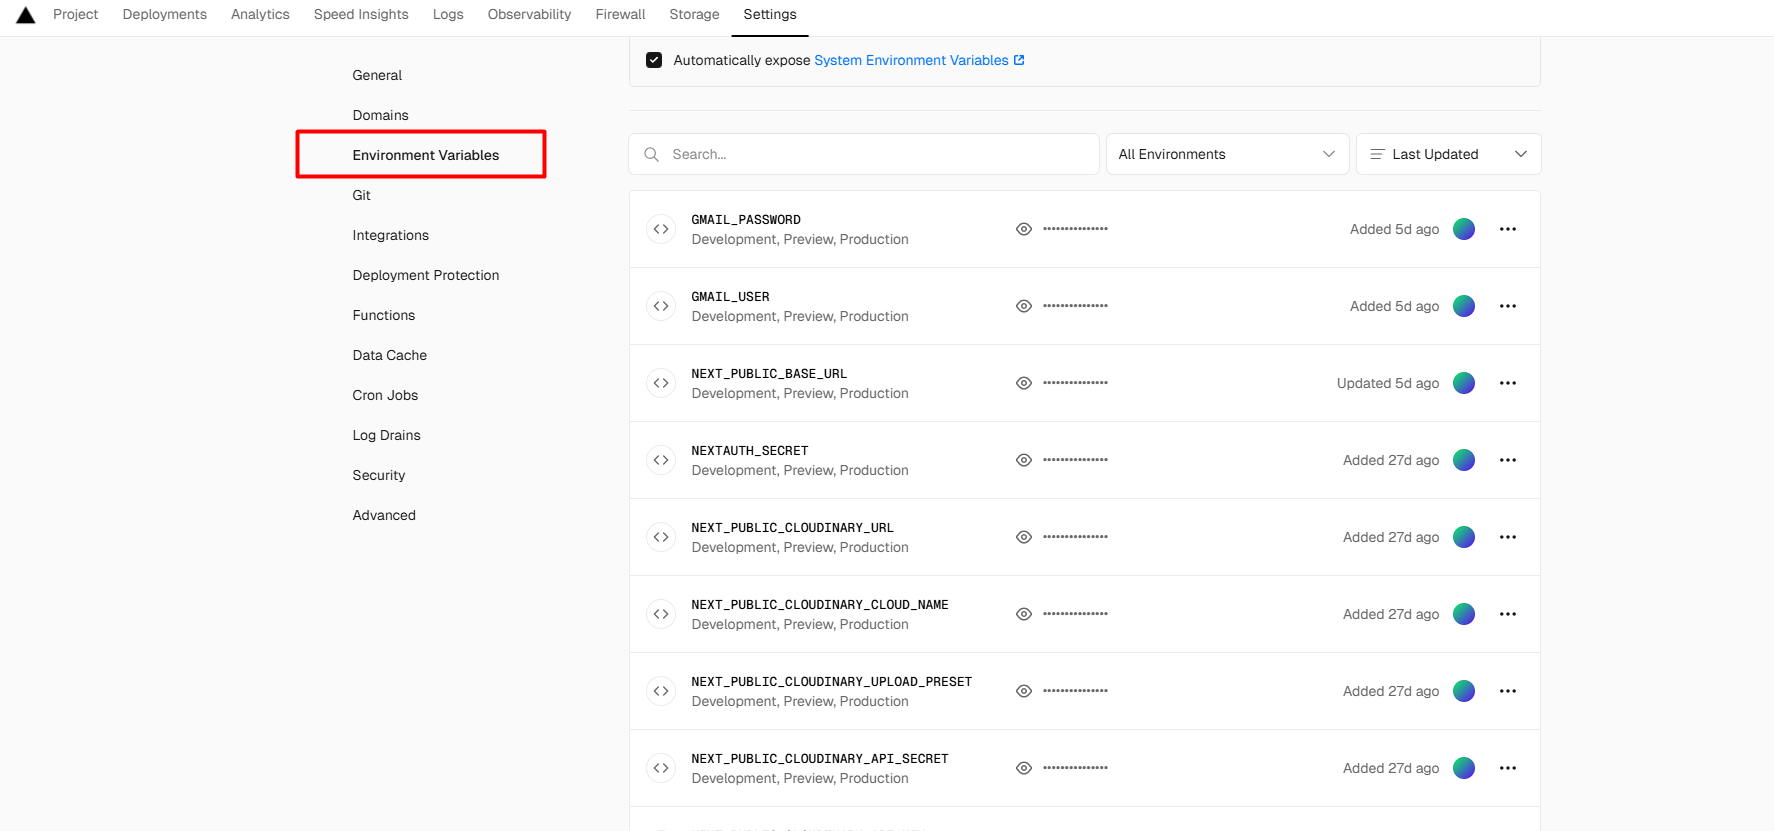
After configuration you .env.local file will look like this
       MONGODB_URI=your mongodb uri
       NEXT_PUBLIC_BASE_URL=http://localhost:3000
       NEXT_PUBLIC_CLOUDINARY_API_KEY=your cloudinary api key
       NEXT_PUBLIC_CLOUDINARY_API_SECRET=your cloudinary secret key
       NEXT_PUBLIC_CLOUDINARY_UPLOAD_PRESET=your cloudinary upload preset
       NEXT_PUBLIC_CLOUDINARY_CLOUD_NAME=your cloudinary name
       NEXT_PUBLIC_CLOUDINARY_URL=your cloudinary url
       NEXTAUTH_SECRET=123456789
       GMAIL_USER=your gmail
       GMAIL_PASSWORD=your gamil app password
Running the grostore
Importing Demo Data
Once you successfully connect with MongoDB and configure the
.env file, run
http://localhost:3000/api/v1/seed then import all demo
data into the database. Make sure to change the demo data in the
utils folder according to your needs.
Run On Live server
As a next.js project vercel is recommended for deployment because If you deploy on vercel then it will automatically do everything for us and there will be no need for customization.
Here is simple guide for deploying backend, store and admin on vercel:
- Create a GitHub account, go to Vercel and sign up with that GitHub account.
- Create three private repositories on GitHub, then push
-
When you import your GitHub repository on vercel by creating a
project, you will see an option for Environment Variables, just
click on that and give you a .env all
variable with the value. then click on deploy.
Note first you will need to import and deploy , so that you can use that live url as store (NEXT_PUBLIC_BASE_URL) . - After the deployed successfully, you will find a URL for your API route that will like this https://grostore-nextjs.vercel.app/, and now change that like this https://grostore-nextjs.vercel.app/v1/api, or https://grostore-nextjs.vercel.app/v1/products, to see the products imported or not and use this as a NEXT_PUBLIC_BASE_URL
- If you do accordingly, then everything will be okay, for now when you make any changes on your local file, you just need to push your code on GitHub, vercel will automatically detect those changes and will redeploy your project with updated features.
You will find many videos on youtube and also articles on google about how to deploy next.js and express apps on vercel.
Run On Local server
To run on local server,
properly configuration open the root folder on VS code or any other code editor. split the Terminal run npm install for nessecery package.
And finally run npm run dev for admin and store.
store will http://localhost:3000/,
and admin http://localhost:3000/admin
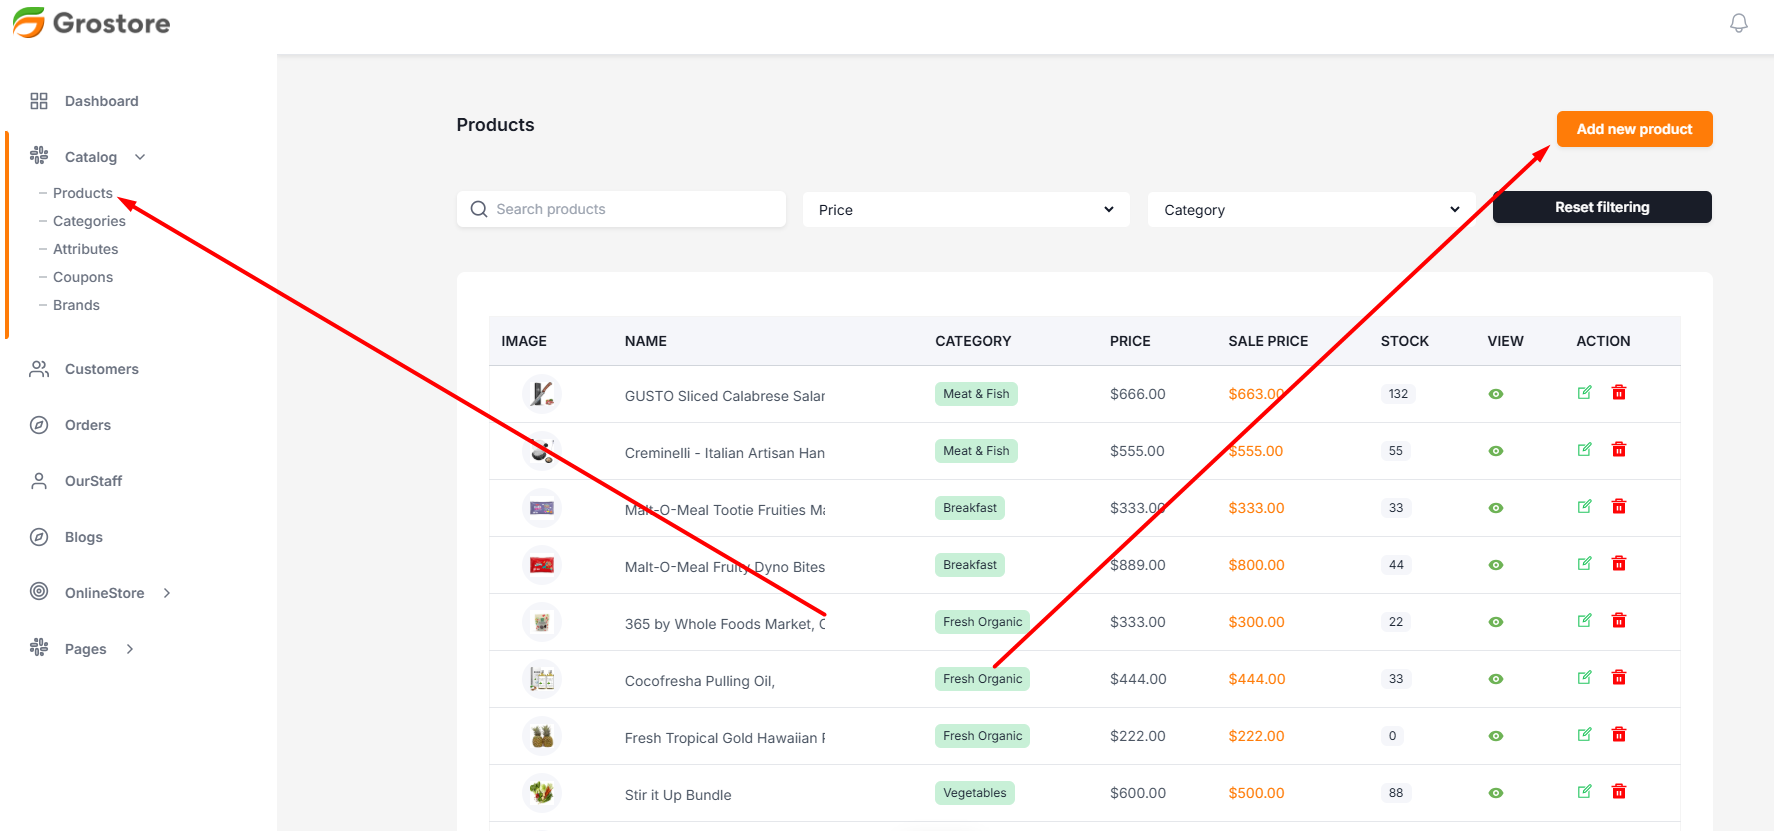
Product CRUD (Create, Read, Update, Delete)
You can add with and without Combination product from here with all necessary information. need.
- Login to the system as Admin
- Go to Catalog tab > Product
- Open the drawer by clicking add product button
- Then fill the information and save
- To Edit Product click on Edit Icon
- To Delete Product click on Delete Icon
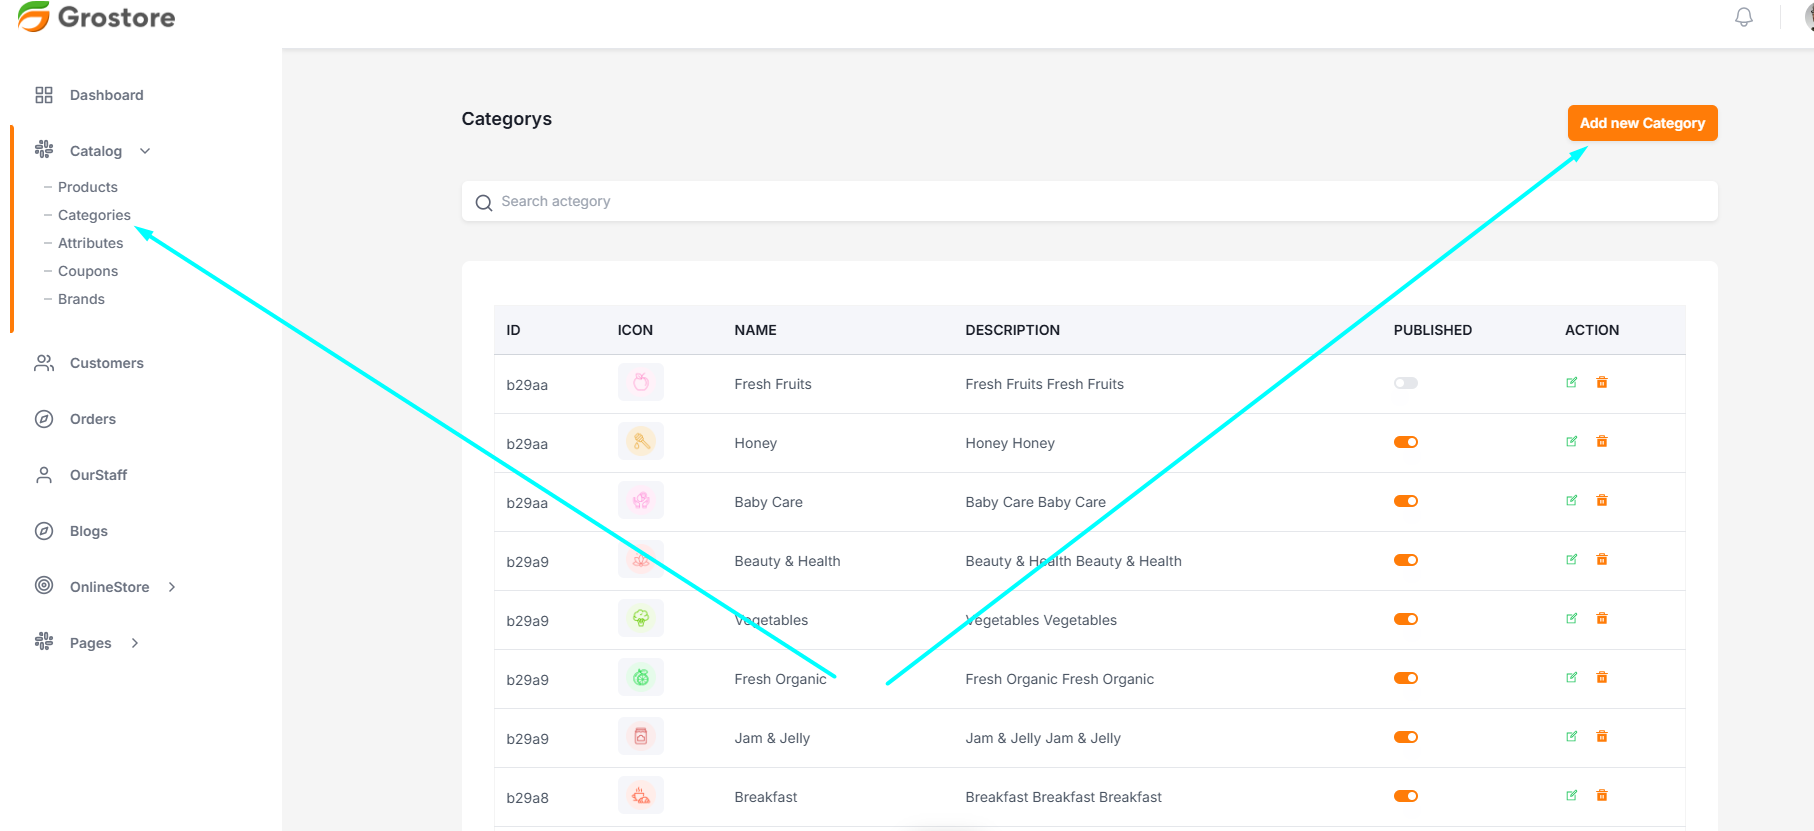
Categories CRUD (Create, Read, Update, Delete)
You can add from here with all necessary information need.
- Login to the system as Admin
- Go to Catalog tab > Categories
- Open the drawer by clicking add category button
- Then fill the information and save
- To Edit category click on Edit Icon
- To Delete cateogory click on Delete Icon
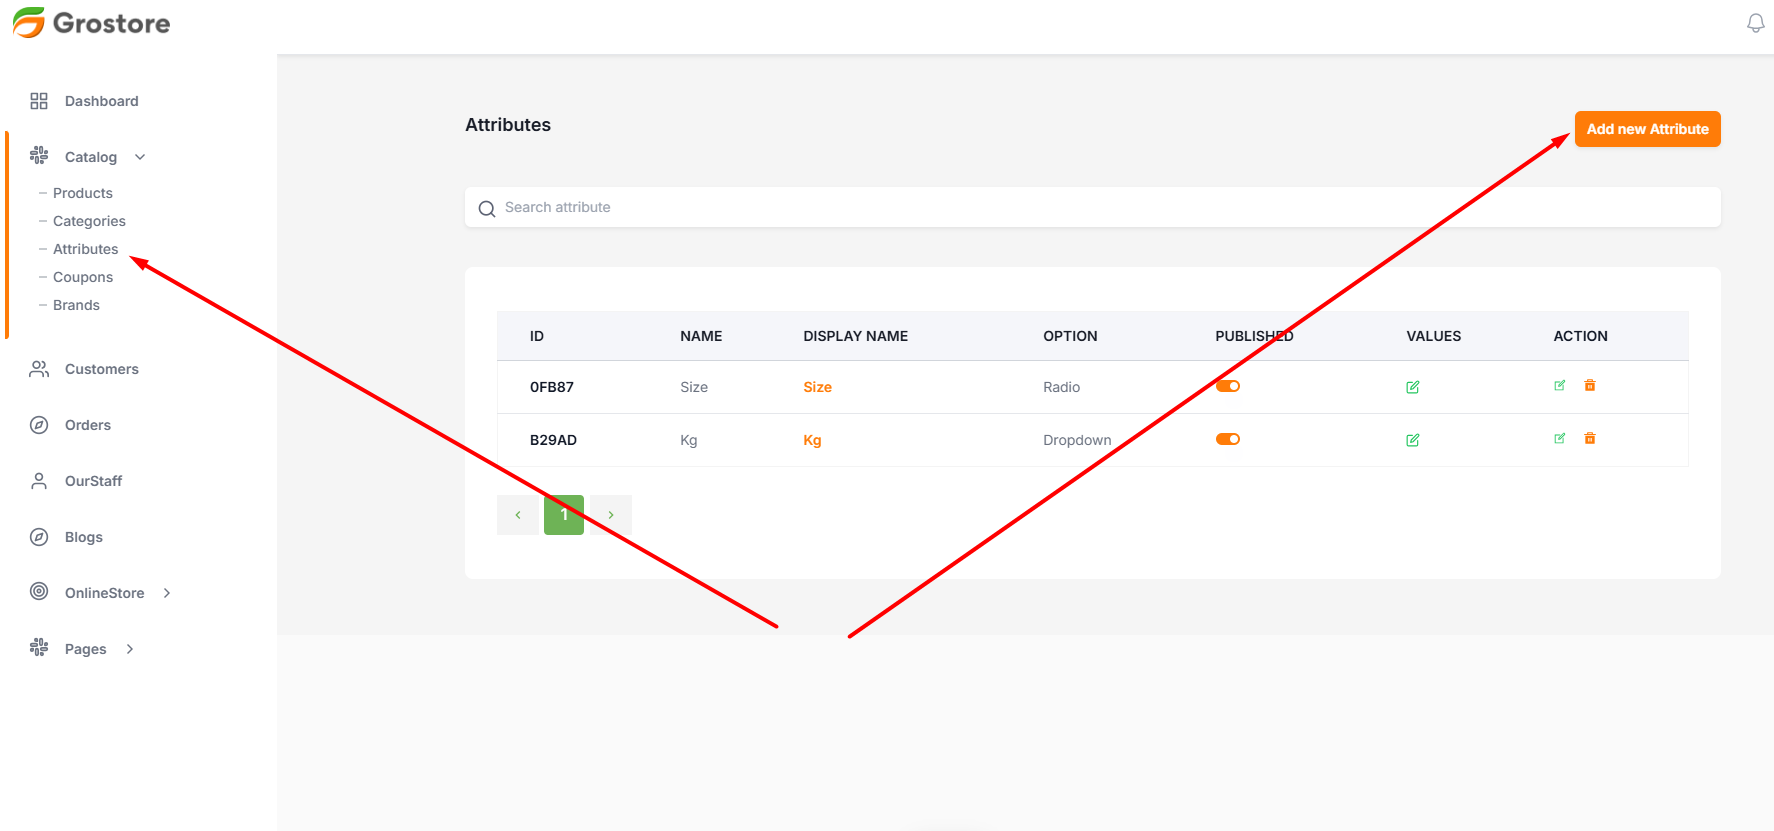
Attribute CRUD (Create, Read, Update, Delete)
You can add from here with all necessary information. need.
- Login to the system as Admin
- Go to Catalog tab > Attribute
- Open the drawer by clicking add attribute button
- Then fill the information and save
- To Edit attribute click on Edit Icon
- To Delete attribute click on Delete Icon
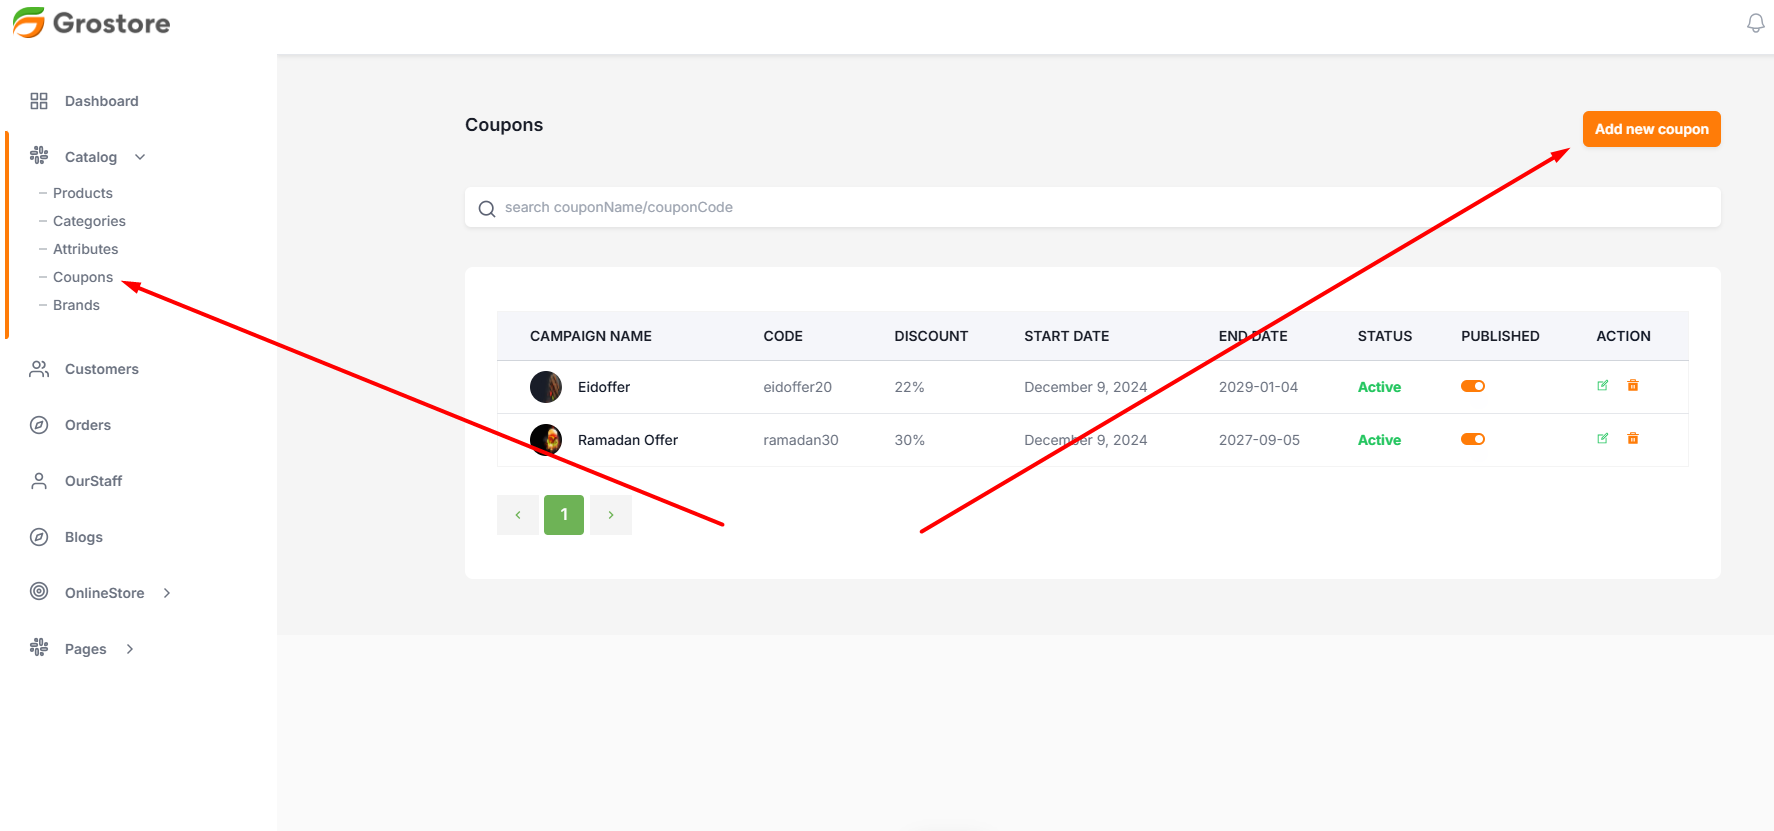
Coupon CRUD (Create, Read, Update, Delete)
You can add from here with all necessary information. need.
- Login to the system as Admin
- Go to Catalog tab > Coupon
- Open the drawer by clicking add Coupon button
- Then fill the information and save
- To Edit Product click on Edit Icon
- To Delete Coupon click on Delete Icon
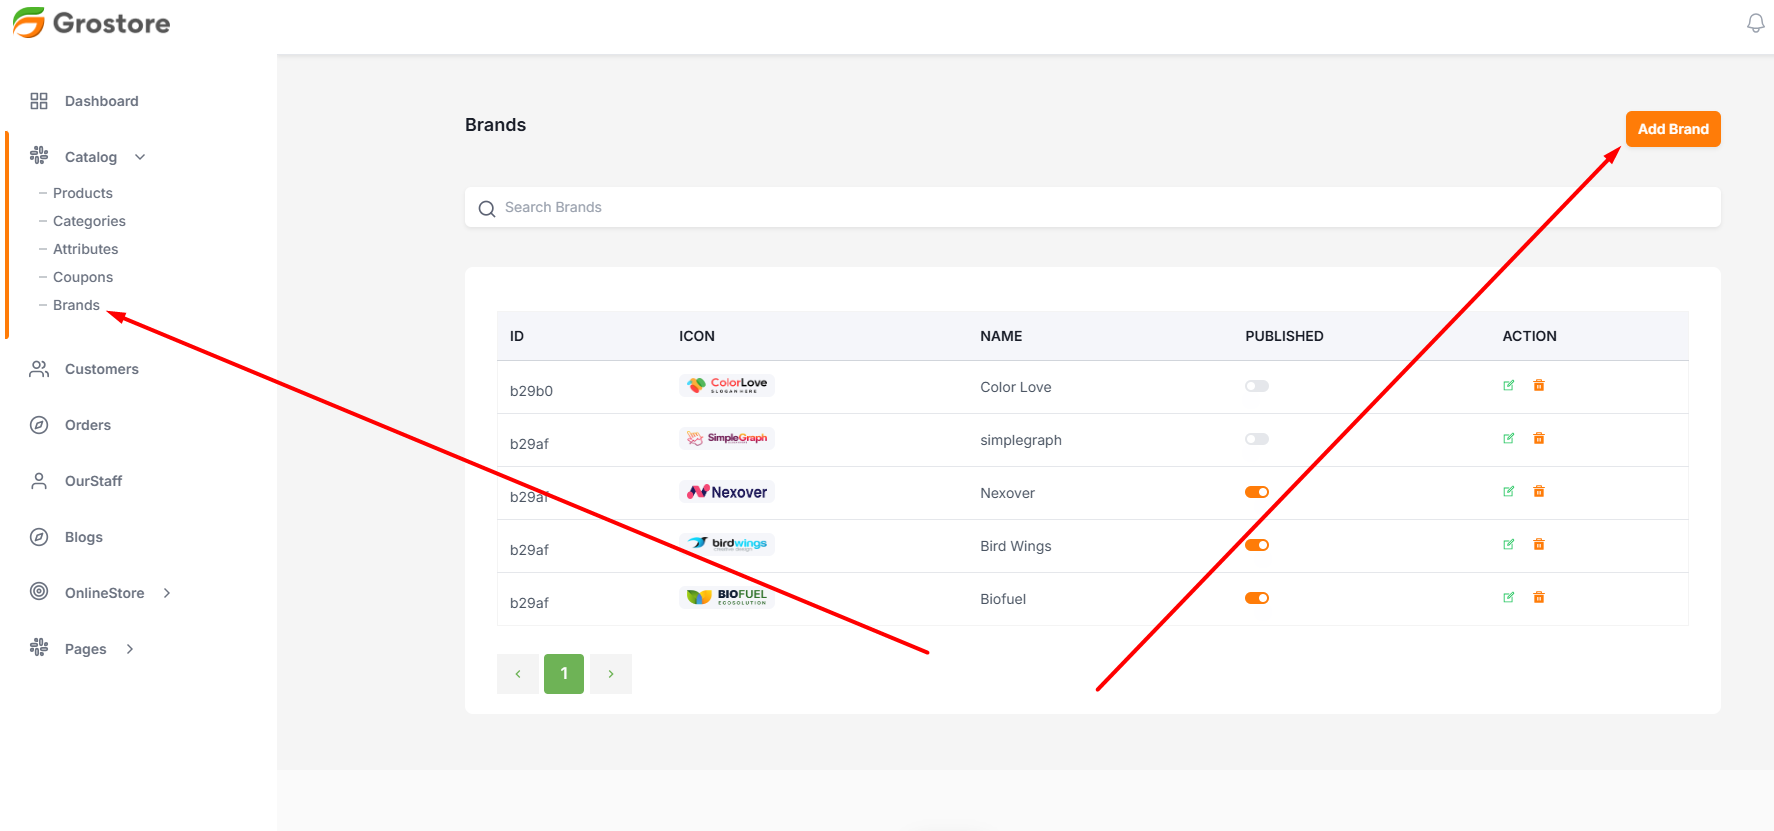
Brand CRUD (Create, Read, Update, Delete)
You can add from here with all necessary information. need.
- Login to the system as Admin
- Go to Catalog tab > Brand
- Open the drawer by clicking add brand button
- Then fill the information and save
- To Edit Brand click on Edit Icon
- To Delete Brand click on Delete Icon
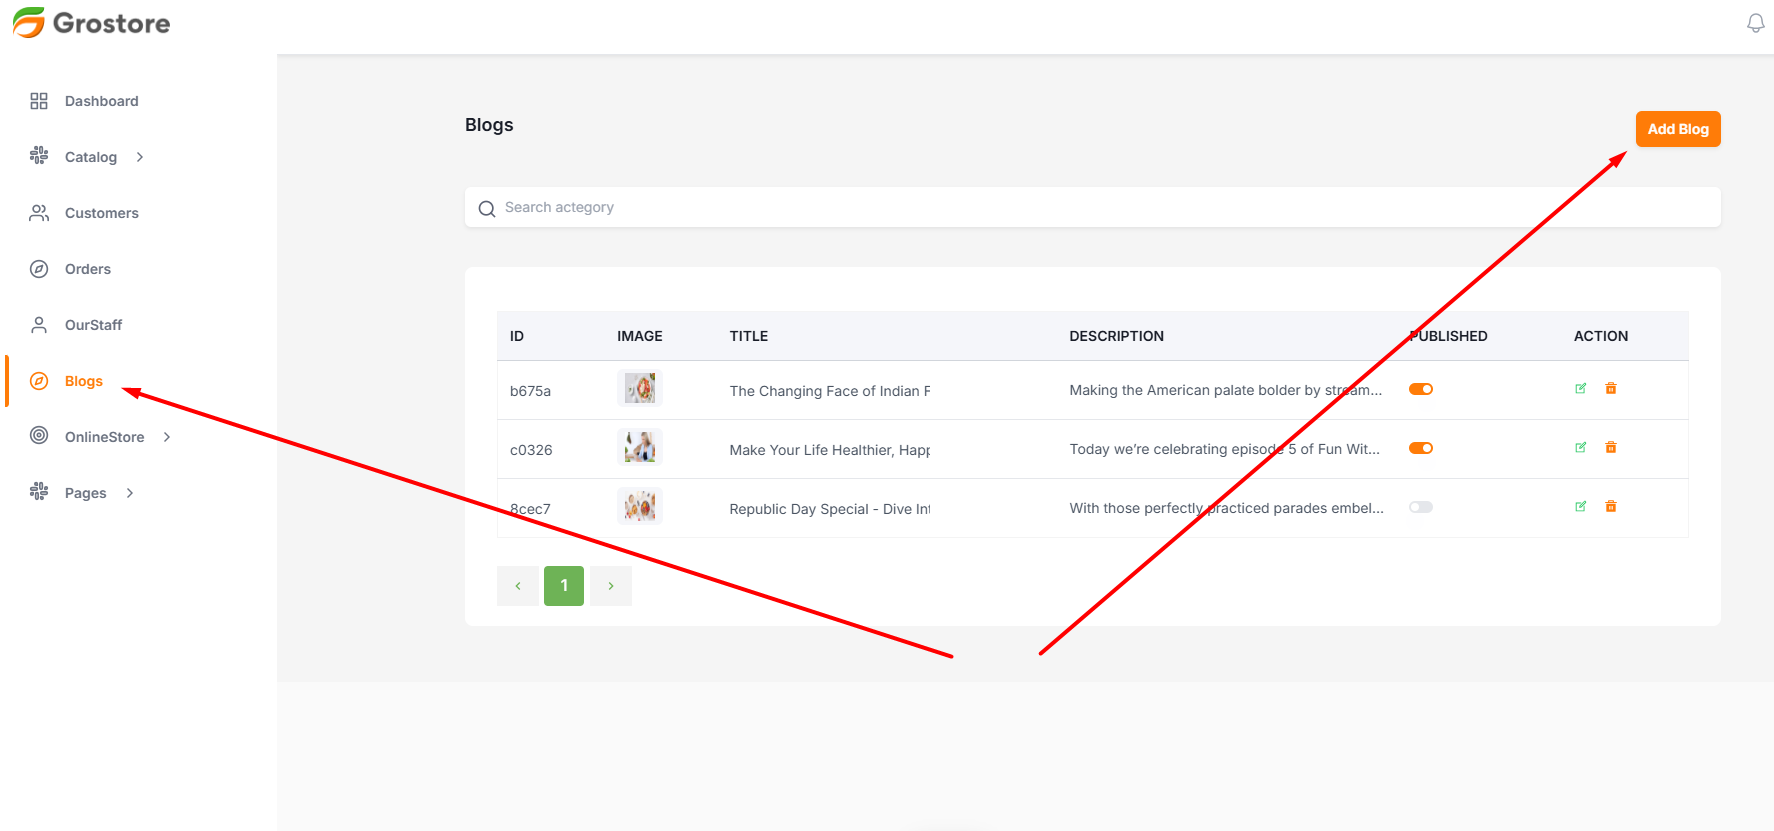
Blogs CRUD (Create, Read, Update, Delete)
You can add from here with all necessary information. need.
- Login to the system as Admin
- Go to Brand
- Open the drawer by clicking add Brand button
- Then fill the information and save
- To Edit Brand click on Edit Icon
- To Delete Brand click on Delete Icon